Intro to Etching
tips to demystify the etching process
Creating your own etchings really isn’t all that difficult! The basic elements needed to create an etching [copper, acid resist, and acid] can be procured online and used at home. For many years I would etch my plates at home and use printing facilities at local art centers/schools to print my work. Here are some suggestions about where/what/how to buy to get started:
Buying Copper
Copper is by far one of the biggest expenses to anyone pursuing etching. Although other metals can be etched, copper is preferred because unlike steel or zinc it can be etched with ferric chloride which is relatively inert and does not require ventilation unlike other mordants which pose fairly serious health hazards. Another benefit of copper is that it is both pliant and resiliant, meaning that it can be easily reworked but can also withstand many printings before breaking down.
When purchasing copper, I personally prefer to buy it through metal suppliers that cater to contractors because the prices are cheaper. Most art stores will also sell copper, but they typically mark up the prices exponentially. Often, copper sold to etchers will also come with one side coated with an acid resist. I don’t like this because I use both sides of the plate. Sometimes the copper will also be sold pre-polished [this is referred to as ‘mirror finish’] which is great but tends to be a lot more expensive.
I am based in Chicago and many of my students will end up buying their copper plates from Dick Blick or the K&S brand copper plates sold at local hardware stores. These copper plates are sold at prices higher than market value and although they are branded as being ready to etch they contain a lot of surface striation from the machining process because they are not polished to mirror finish [i.e., if your print them without polishing them you’ll inevitably see some horizontal lines on the surface].
If money is of any concern, allow me to strongly suggest that you purchase your copper through a metal supplier. In doing so you can select the gauge [i.e., thickness]. Many suppliers will also cut the copper down to size for you at no additional cost. In the Chicago area my preferred supplier is:
-Metal Supermarkets
Alternately, I encourage you to search out ‘metal supply near me’ and you will likely find an equivalent in your area. When ordering your metal you will have a number of choices including thickness/gauge and hardness/temper. The higher the gauge number, the thinner the copper. I recommend that you go no thinner than 19g [gauge is appreviated to ‘g’]. Anything thinner than 19 will not give you a good impression unless it is laminated onto a thicker material such as mdf or another metal plate. It will also be too bendy and you run the risk of etching straight through it.
In my experience the hardness/temper of the copper has little bearing on how it handles. Copper is typically available in six tempers designated by ASTM B370 as: 060 (soft), H00 (cold rolled), H01 (cold rolled, high yield), H02 (half hard), H03 (three quarter hard), and H04 (hard). I typically order copper that is at a H01 or H00 hardness. My psychology here is that historically plates were created by tedious hand-hammering, which hardened the copper but not nearly as much as contemporary machining can. An H04 hardness of copper is unecessary, more expensive, and potentially to harder to work with.
Here is an example of one of my typical copper invoices:

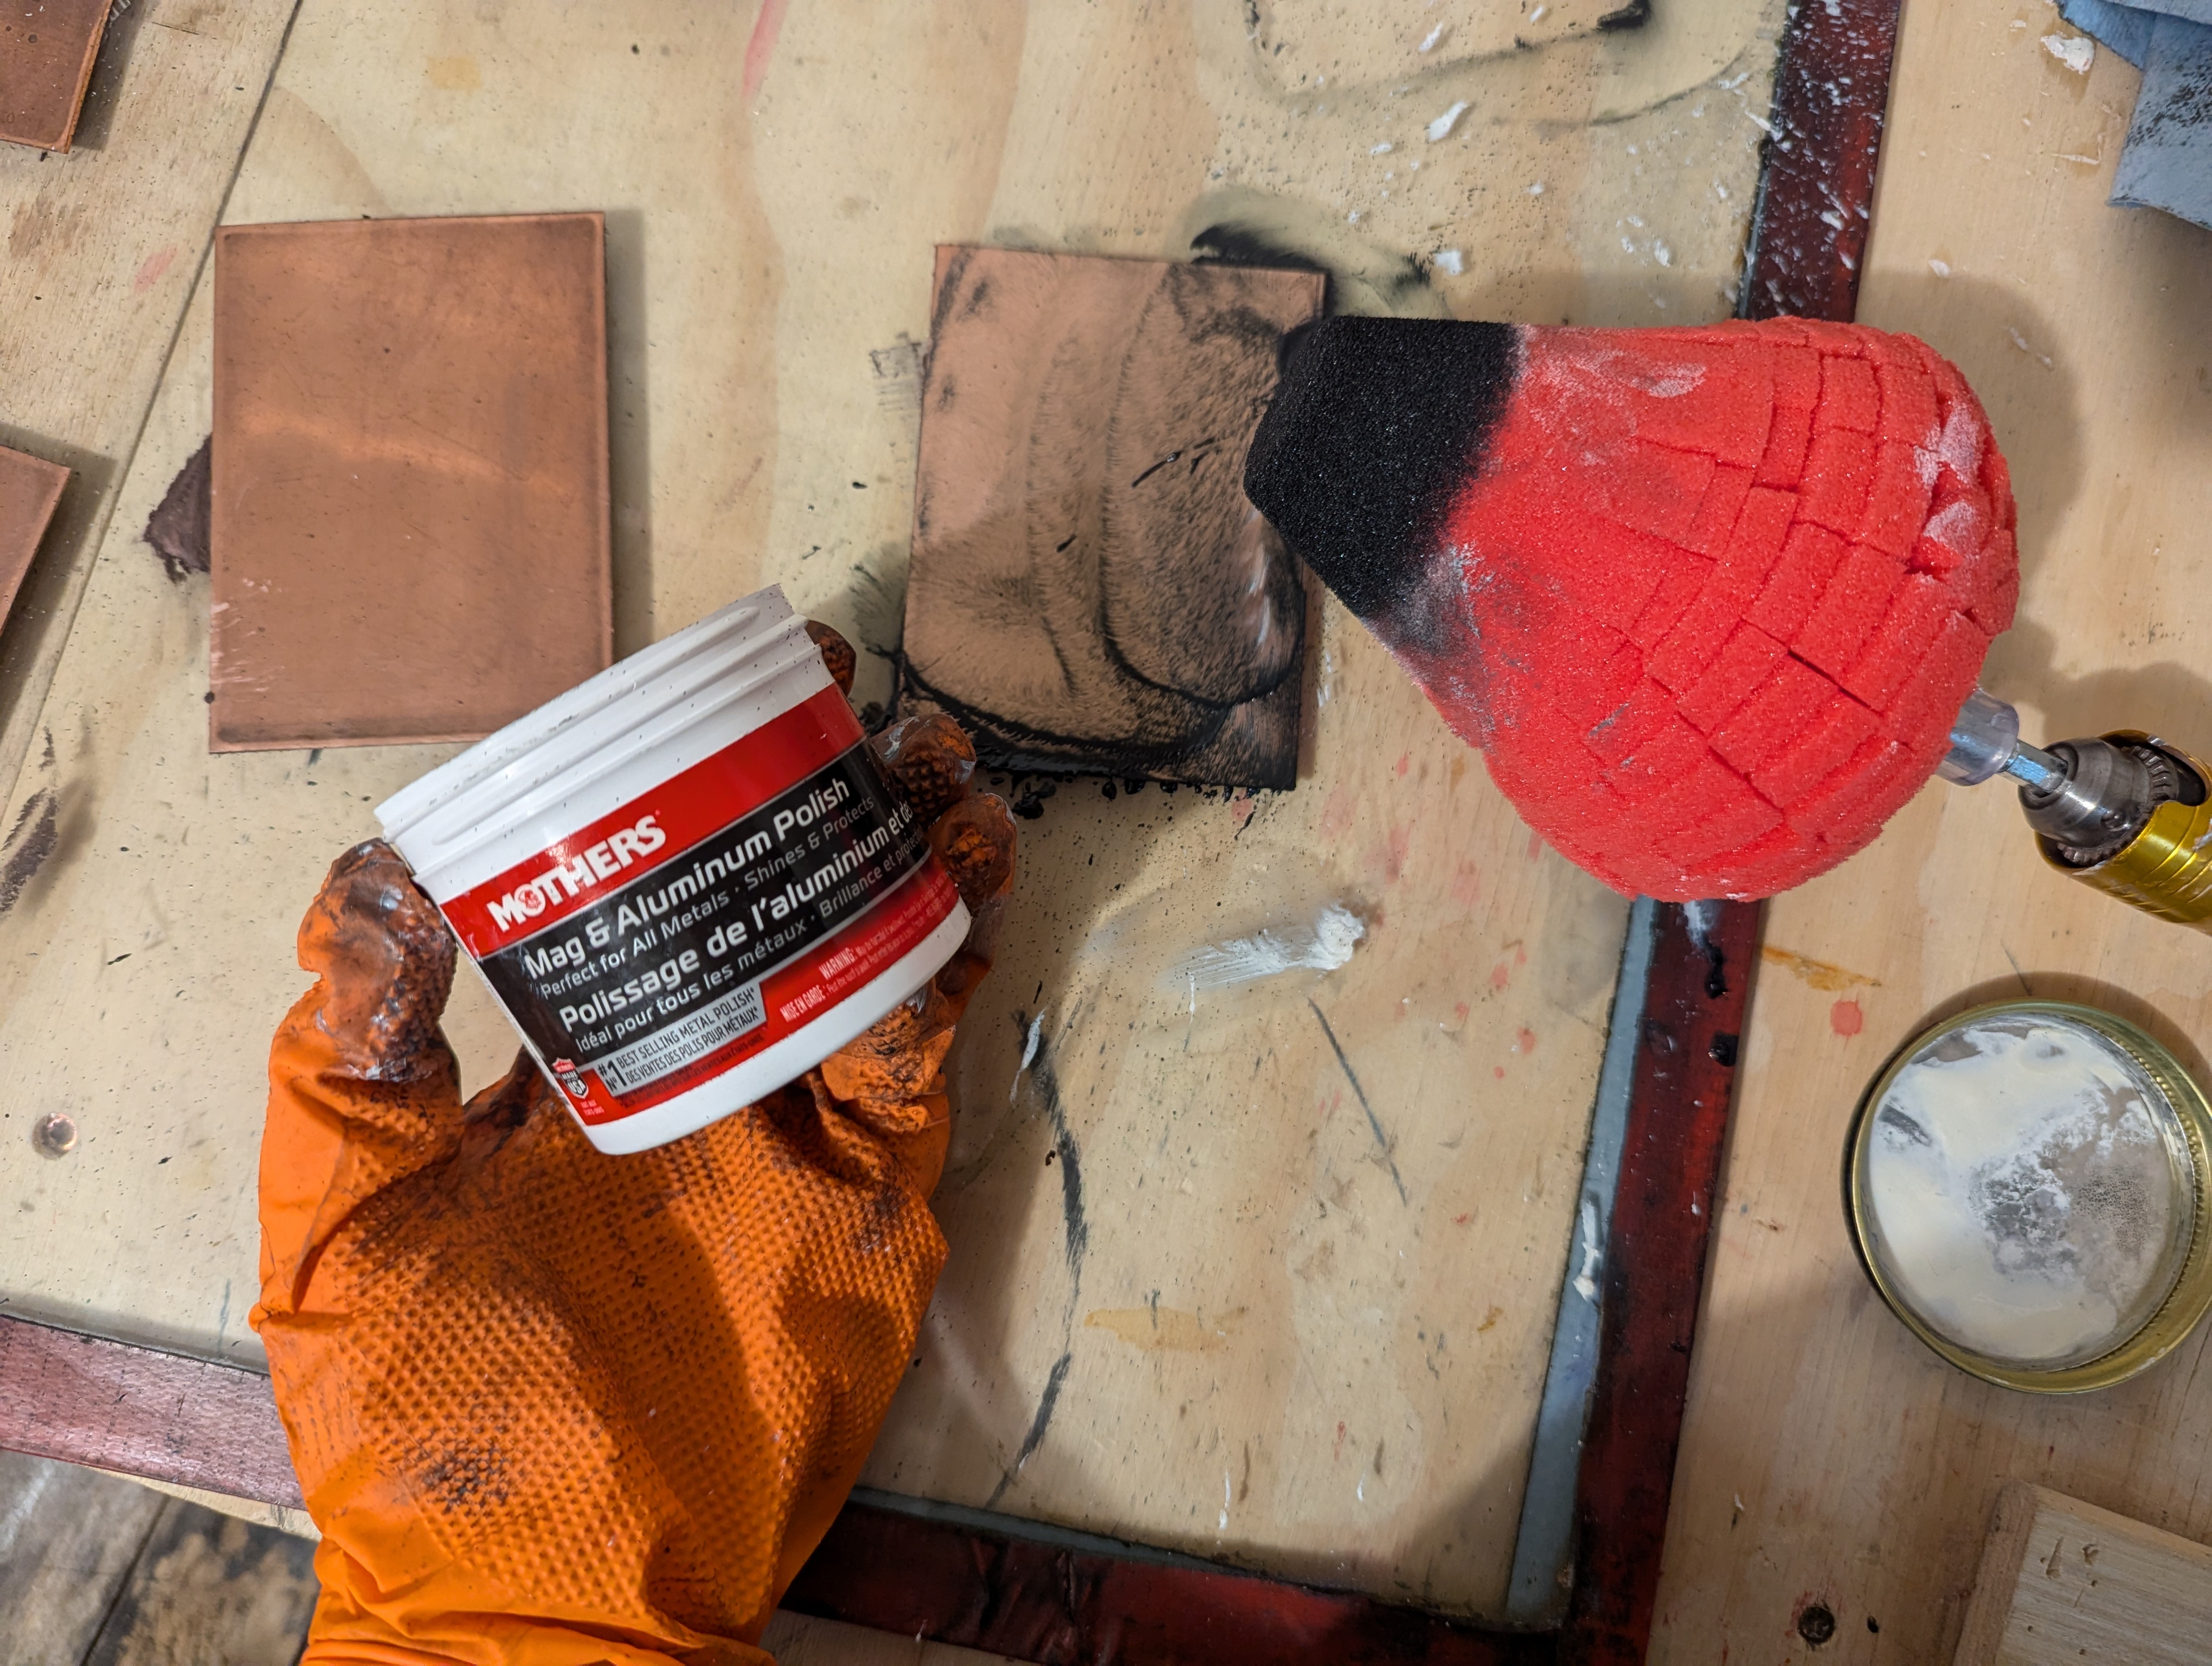
When you purchase copper through a metal supplier it will typically
contain some scratches from the machining proces/getting tossed around. I
use an orbital sander with various grits started with 2000 if it’s really
scratched up and then I’ll take it incrementally up to 5000. You can also just use putz pomade and wet sanding sand paper at a 5000 grit or higher. For the
final polish I use automotive polish (any of the regular hardware store variety
will do, the kind that comes with a polishing attachment for your drill head)
to bring it up to a mirror finish.
![]()
![]()
If money is of no concern, please ignore the above, and I encourage you to buy mirror-polish copper of a lower gauge. 16g for example is nice to work with. Mirror polish copper typically comes with a blue plastic backing that is satisfying to peel off and reveals perfectly reflective copper underneath. Some suppliers:

-Takach
Buying Acid
Various mordants (commonly referred to as ‘acid’) can be used to etch copper but ferric chloride is by far the most common. Not technically acid, bur rather a corrosive salt, ferric chloride (from here on referred to as ‘FeCl’) can be purchased in dry/liquid form and mixed with water to varying strengths (etching strength is referred to as ‘Baume’ or Be).
FeCl will often be sold as premium grade vs. regular grade. I have found that unless you are doing really finicky etching like photogravure, the regular grade works fine.
For ease of use, I recommend that you purchase your FeCl in liquid form from a printmaking supplier. In doing so you can be assured that it is ready to etch with, even straight out of the bottle.
-FeCL from Renaissance Graphics
It will be at 42 baume which will give great results for almost all basic etching techniques. Straight out of the gallon it is ready to etch with. Just be sure that you don’t allow it to come into contact with any other metals other than copper; that will ruin its copper etching capabilities. Use only glass or plastic containers to store it/etch in.
Although relatively inert, FeCl loves to cause ferrous metals to rust. Do not store it near anything ferrous and when it is not in use keep it covered so that it doesn’t off-gas or dehydrate into a concentrated solution. If you should get it on your skin, it’ll by a little itchy but will be made harmless by rinsing off with soap and water. If you get it in your eyes, rinse them for 15 minutes. If you get it on your clothes, it’ll discolor them and might eat holes into the fabric. When rinsing off your plates I recommend dunking them into waste water before rinsing them in your sink because it can corrode pipes; and after rinsing, let the water run for some time afterward.
Also note that temperature will greatly change the etching properties of ferric chloride. Under 50 degrees and it will etch very very slowly if at all; over 80 degrees, and it will etch much more quickly and aggressively.
When you’re first starting out, I recommend that you don’t get too caught up in any of the teeny details about baume, where to etch, which type of etching tank to get et.c. Just buy yourself a gallon of FeCl, use any plastic container/tupperware/glass casarole dish to etch your plate in, and then when you’re done etching use a funnel to pour the acid back into the original gallon and store it in some forgotten corner of your nasty apartment.
Ground, Ink and Paper
Every printmaker is bound by their personal experience and the conventions they have been taught. That being said, please take all of the following suggestions with a grain of salt. There are many other options and according to your style of working they may work better for you than these suggestions:
Ground aka Acid Resist:
I find ball ground easier to apply than liquid ground because it can be reworked when applied, it can easily be applied in various thicknesses, and it requires no dry time. It also is less fume-y than liquid ground and I find it has a longer shelf life. Ball hard ground also tends to be more translucent than liquid hard ground and so is better for reworking a plate than has already been etched. If you are buying your ball ground instead of mixing your own, I recommend Charbonnel’s products.
Ink:
Charbonnel inks have excellent workability straight out of the tube. They are highly pigmented and the pigments are well sourced and mix well with each other. They have a wide range of products and all can be purchased in tube form, which is less wasteful when used on small scales than the can form which inevitably gets gouged/dries out. Their water miscable products are also excellent and I highly recommend them.
Paper:
Hahnemuhle is minimally sized and can be printed with very short soak times (a minimum of 15 minutes) and will pick up a higher range of value than papers of similar quality (I’m looking at you, BFK/Fabriano) with less soaking and without any picking [a.k.a. getting stuck onto the copper plate].
Supplier for ground/ink:
-Renaissance Graphics-Dickblick
Paper supply:
-Acuity PapersSuggested Reading
- The Art of Etching
by E. S. Lumsden is a good overview, and includes recipes. Despite being 100+ years old I’d argue that it is still one of the most complete stand alone volumes on the subject you can buy.
-Any of the Magical Secrets series from Crown
Point Press; their books
are excellent resources for solving common etching problems
-If you’re looking for a general overview of printmaking in the Western tradition:
The Print in the Western Worldby
Linda C Hults is incredibly thorough and accessible
- Prints and Their Makers